MAME Cabinet
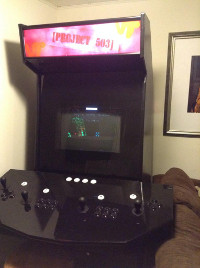
 In 2003, after one of my coworkers built an arcade machine, one of my roommates and I built an arcade together. As an architect with access to a full wood shop, he modified the plans to fit our desires and cut out the cabinet pieces. We worked together on assembly. I painted, wired, and provided the computer inside. The cabinet provided many years of enjoyment, both during my tenure at the legendary 503 #3 Center Street and post graduation.
However, around 2011, the hard drive in the arcade computer started showing signs of failure. Everything on the machine was very out of date as well. It was time for a new arcade brain. I replaced the purchased in 1998 computer with a $200 “nettop”. However, I was never able to get all the elements as slickly integrated as with the original system. It was bad enough that another roommate reloaded the computer with a Windows-based system. It didn’t work well either. Fast forward to 2014. The machine at the office was getting a rebuild and I used it as an incentive to rebuild mine the right way.
Since I had many false starts along the way, the following steps may not be 100% complete, but are designed to help you replicate my success of using mame and AdvMenu on Ubuntu. I’m currently running Ubuntu 14.04 LTS in 64 bit desktop mode. You must be running a Debian or Ubuntu distribution for these steps to work.
- Install required packages
- sudo apt-get install apt-file build-essential zlib1g-dev libexpat1-dev x11proto-video-dev libxv-dev libsdl-gfx1.2-dev libsdl1.2-dev
- sudo apt-get install gcc libtool libslang2-dev libsdl1.2debian libfreetype6-dev libexpat1-dev libsdl1.2-dev make libxml2-dev g++ fbset
- Install AdvanceMame
- wget http://sourceforge.net/
projects/advancemame/files/ advancemame/1.2/advancemame-1. 2.tar.gz/download -O advancemame-1.2.tar.gz - tar -xzvf  advancemame-1.2.tar.gz
- cd advancemame-1.2
- sudo ./configure
- sudo make
- sudo make install
- wget http://sourceforge.net/
- Install AdvanceMenu
- wget http://prdownloads.
sourceforge.net/advancemame/ advancemenu-2.7.tar.gz? download -O advancemenu-2.7.tar.gz - tar -xzvf  advancemenu-2.7.tar.gz
- cd advancemenu-2.7
- sudo ./configure
- sudo make
- sudo make install
- wget http://prdownloads.
- Place games in correct directories
- I put my games in /usr/local/share/games, keeping the folder structure as the source
- Set up your mame.ini
- Run mame
- cd ~/.mame
- mame -cc
- Copy the mame.ini file to /usr/
- Switch to Gnome so we can disable 3D and make this little compy run faster
- sudo apt-get install gnome-session-fallback
- Log out
- In the login window, click on the Ubuntu logo next to your user name
- Then click on GNOME Flashback (Metacity)
- Note: don’t select GNOME Flashback (Compiz), because that also has 3D effects
- Log in again
- Change settings to enable automatic login
- System Settings -> User Accounts
- Click the button in the top corner to unlock the window
- Turn on Automatic Login
- Click on Password and change the action to Login without a password
- Auto start advmenu
- Ubuntu menu -> System Tools -> Preferences -> Startup Applications
- Add. Give name AdvanceMenu, command advmenu, and press Add
- I also changed the desktop background to be solid black so changes between games are less jarring
- Restart to confirm functionality